
Canon AE-1 Program: A Comprehensive Guide
Canon provides detailed instruction manuals, service documentation, and support resources for the AE-1 Program camera, aiding users in operation and maintenance.
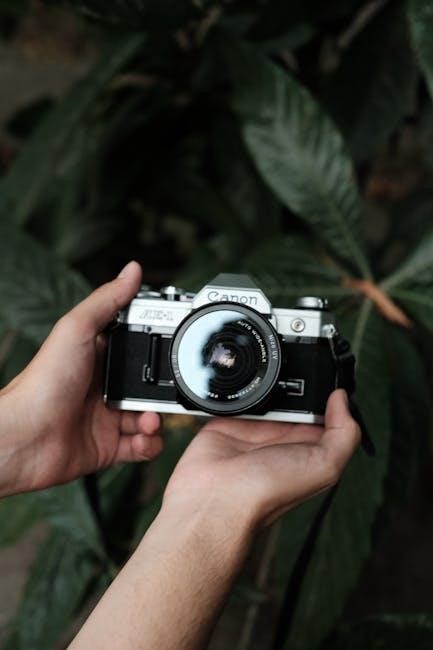
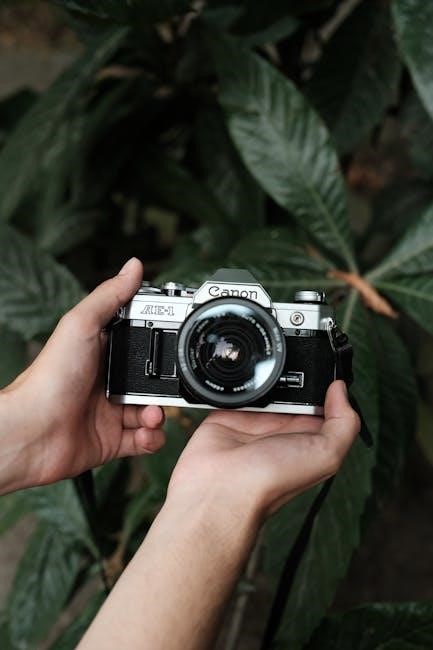
The Canon AE-1 Program, released in 1987, represents a significant evolution in the Canon A-series of 35mm SLR cameras. It builds upon the success of the original AE-1, introducing a fully programmed auto-exposure mode alongside traditional aperture-priority and shutter-priority options, and full manual control. This camera was designed to simplify photography for enthusiasts while still offering creative flexibility.
Accessing the Canon AE-1 Program manual is crucial for understanding its features. The manual details everything from film loading and basic operation to advanced techniques and troubleshooting. It explains the camera’s various modes, metering systems, and how to utilize external flash units (Speedlites). Understanding the manual unlocks the full potential of this classic camera, allowing photographers to achieve optimal results and explore its capabilities.
Historical Context and Significance
The Canon AE-1 Program arrived during a pivotal shift in camera technology, as manufacturers increasingly integrated automation to broaden photography’s appeal. Released after the original AE-1, it aimed to simplify exposure control with its Program mode, appealing to a wider audience. The availability of a comprehensive instruction manual was vital for users navigating these new features.
Its significance lies in bridging the gap between fully automatic and manual control, offering photographers choices. The camera’s compatibility with Canon’s FD lens mount, and the detailed guidance within its manual, allowed for a versatile system. Service manuals, like those available online, demonstrate the camera’s enduring relevance for repair and restoration, solidifying its place in photographic history. The AE-1 Program represents a key step in the evolution of accessible SLR photography.
Key Features and Specifications
The Canon AE-1 Program boasts several defining features, thoroughly explained within its instruction manual. It offers Program, Shutter Priority, Aperture Priority, and Manual modes, providing versatile control. The camera utilizes a microprocessor for programmed exposure, a significant advancement for its time. It accepts Canon’s FD mount lenses, offering a wide range of optical choices.

Key specifications include a focal plane shutter with speeds from 2 to 1/1000 seconds, and film speed settings from ISO 25 to 3200. The viewfinder displays essential exposure information. The manual details operation with various Speedlites, up to nine models, enhancing flash photography capabilities. Its robust build and detailed manual contributed to its popularity and enduring appeal among photographers seeking a reliable and feature-rich SLR.

Understanding the Camera’s Components
The instruction manual details the Canon AE-1 Program’s body, external controls, and FD lens mount, ensuring users grasp each component’s function effectively.
Body and External Controls
The Canon AE-1 Program’s body, as outlined in the instruction manual, features robust construction and intuitive controls. Key elements include the film advance lever, rewind crank, and shutter release button, all designed for smooth operation. The top panel houses the mode selector, allowing switching between Program, Shutter Priority, Aperture Priority, and Manual modes.
The manual meticulously explains the function of each dial and button. The exposure compensation dial adjusts brightness, while the depth-of-field preview lever visualizes the in-focus area. The film speed dial sets ISO sensitivity, crucial for accurate exposure. Furthermore, the instruction manual details the location and purpose of the battery compartment and film chamber, ensuring proper film loading and battery replacement procedures are followed for optimal performance and longevity of the camera.
Lens Compatibility (FD Mount)
The Canon AE-1 Program, as detailed in its instruction manual, utilizes the Canon FD (Focusing Device) lens mount. This system allows compatibility with a wide range of FD and FD New lenses, offering diverse focal lengths and apertures. The manual emphasizes the importance of using FD lenses specifically designed for the Canon system to ensure proper functionality and optimal image quality.
It clarifies that lenses marked with an “A” designation support aperture-priority shooting, automatically setting the aperture based on the selected shutter speed. The instruction manual also notes compatibility with some third-party FD mount lenses, though performance may vary. Proper lens attachment and detachment procedures are thoroughly explained, including aligning the red dot on the lens with the corresponding mark on the camera body, guaranteeing a secure connection.
Viewfinder Information and Display
The Canon AE-1 Program’s instruction manual dedicates significant detail to understanding the viewfinder display. It highlights key indicators visible during operation, including shutter speed, aperture value, and exposure compensation settings. The viewfinder features an LED display, providing crucial information for precise exposure control. The manual explains how these LEDs illuminate to indicate overexposure, underexposure, or correct exposure, assisting photographers in achieving desired results.
Furthermore, the instruction manual clarifies the function of focus confirmation lights within the viewfinder, aiding manual focusing. It details how the display changes based on the selected operating mode – Program, Shutter Priority, Aperture Priority, or Manual – ensuring users are aware of the current camera settings. Understanding these visual cues is paramount for effective use of the AE-1 Program.

Operating Modes Explained
The Canon AE-1 Program instruction manual thoroughly details Program, Shutter Priority, Aperture Priority, and Manual modes, enabling versatile photographic control for all users.
Program Mode: Automatic Exposure
The Canon AE-1 Program’s Program mode, as explained in the instruction manual, offers fully automatic exposure control, simplifying photography for beginners. This mode intelligently selects both the shutter speed and aperture based on the camera’s internal metering system, ensuring properly exposed images in various lighting conditions. When using an FD lens set to the ‘A’ mark, the shutter speed automatically defaults to 1/60th of a second, and the aperture is set to automatic.
The manual emphasizes that Program mode is ideal for everyday snapshots and situations where precise control isn’t crucial. However, it also notes that users relinquish direct control over these settings. The camera prioritizes a balance between sharpness (via shutter speed) and depth of field (via aperture). Understanding this trade-off, detailed within the manual, is key to maximizing the benefits of Program mode. It’s a convenient starting point for learning the camera’s capabilities.
Shutter Priority Mode (Tv)
The Canon AE-1 Program’s Shutter Priority mode (indicated as Tv on the dial), as detailed in the instruction manual, allows photographers to select a specific shutter speed while the camera automatically adjusts the aperture for correct exposure. This mode is particularly useful for controlling motion – freezing action with fast shutter speeds or creating motion blur with slower ones. The manual clarifies that the user sets the desired shutter speed, and the camera calculates the appropriate aperture value.
The instruction manual cautions that in low-light situations, the aperture may open to its widest setting, potentially resulting in a shallow depth of field. It also explains how the camera’s light meter assists in determining if the selected shutter speed and resulting aperture will produce a properly exposed image. Mastering Tv mode, as the manual guides, empowers photographers to creatively manipulate motion and achieve specific artistic effects.
Aperture Priority Mode (Av)
The Canon AE-1 Program’s Aperture Priority mode (labeled Av on the camera’s dial), as explained in the instruction manual, grants photographers control over the lens aperture, while the camera automatically selects the appropriate shutter speed for correct exposure. This mode is ideal for managing depth of field – achieving a shallow focus for portraits or maximizing sharpness throughout a landscape. The manual emphasizes that setting the aperture directly influences the area of acceptable focus in the image.
The instruction manual also notes that in low-light conditions, the camera may choose a slow shutter speed, potentially requiring a tripod to avoid camera shake. It details how the camera’s metering system works in conjunction with the selected aperture to determine the optimal shutter speed. Understanding Av mode, as the manual instructs, allows photographers to creatively control focus and depth within their images.
Manual Mode (M)
The Canon AE-1 Program’s Manual mode (M), as detailed in the instruction manual, provides complete photographer control over both aperture and shutter speed. This mode bypasses the camera’s automatic exposure systems, demanding a thorough understanding of the exposure triangle. The manual stresses the importance of using the camera’s built-in light meter as a guide, but ultimately, the photographer dictates the exposure settings.
The instruction manual explains that in Manual mode, the photographer must independently adjust both aperture for depth of field and shutter speed to control motion blur and overall brightness. It cautions users to regularly check the light meter reading and adjust settings accordingly. Mastering Manual mode, according to the guide, unlocks full creative potential, allowing precise control over the final image’s look and feel.

Focusing and Exposure Settings
The Canon AE-1 Program instruction manual details metering modes, exposure compensation, and focusing techniques for optimal image quality and creative control.
Autofocus System Details (if applicable ⏤ limited on AE-1 Program)
The Canon AE-1 Program, released before widespread autofocus technology, primarily relies on manual focusing methods. The instruction manual comprehensively guides users through achieving sharp focus utilizing the viewfinder’s split-image focusing aid and microprism collar. While not featuring an integrated autofocus system like later Canon models, the camera’s design prioritizes precise manual control.
External autofocus capabilities were not natively supported. However, some users explored adapting third-party autofocus accessories, though these were not officially endorsed or detailed within the standard Canon documentation. The manual emphasizes mastering depth of field and utilizing the camera’s focusing screen for accurate results. Understanding these manual techniques is crucial for maximizing the AE-1 Program’s potential, given its lack of built-in autofocus functionality.
Metering Modes and How They Work
The Canon AE-1 Program’s instruction manual details its center-weighted averaging metering system. This mode prioritizes light readings from the center of the frame, diminishing sensitivity towards the edges. The camera analyzes this weighted average to suggest appropriate aperture and shutter speed combinations for correct exposure. Users can override these suggestions in aperture-priority or shutter-priority modes.
The manual explains how the metering system responds to varying light conditions, including bright or dark subjects. It also clarifies the impact of different lens apertures on metering accuracy. Understanding the center-weighted nature of the metering is vital for achieving consistent results, particularly in high-contrast scenes. The Canon system aims for a balanced exposure, but manual adjustments are often necessary for creative control or challenging lighting scenarios, as outlined in the provided documentation.
Exposure Compensation Techniques
The Canon AE-1 Program’s instruction manual explains exposure compensation as a crucial tool for overcoming the limitations of the camera’s metering system. When shooting scenes with extreme brightness or darkness, the automatic metering can be misled, resulting in under or overexposed images. Exposure compensation allows users to manually adjust the metered exposure value.
The manual details how to use the exposure compensation dial to add or subtract light, effectively brightening or darkening the image. Positive compensation (+ values) are used for dark subjects to increase exposure, while negative compensation (- values) are used for bright subjects to decrease exposure. Mastering this technique, as described in the Canon documentation, ensures accurate exposures in challenging lighting conditions and allows for creative control over image brightness.

Maintenance and Troubleshooting
Canon’s instruction manual details battery replacement, film loading, and common issues with the AE-1 Program, offering solutions for optimal camera performance.
Battery Information and Replacement
The Canon AE-1 Program utilizes 4LR44 or equivalent 6V lithium batteries to power its electronic functions, including the light meter and electronic shutter. The instruction manual emphasizes using high-quality batteries for reliable performance. Battery life varies depending on usage frequency and environmental conditions, but generally, a fresh set should provide ample power for several rolls of film.
To replace the battery, locate the battery compartment on the bottom of the camera. Use a small screwdriver to open the compartment cover. Carefully remove the old battery and insert the new one, ensuring correct polarity (+ and -) as indicated inside the compartment. Close the cover securely. The viewfinder display will indicate low battery power, prompting replacement. Always dispose of used batteries responsibly, following local regulations.
Canon recommends checking the battery condition periodically, even if the camera appears to be functioning normally, to avoid unexpected power loss during shooting.
Film Loading and Unloading Procedures
The Canon AE-1 Program’s instruction manual details a straightforward film loading process. First, open the back cover using the film release latch. Insert the 35mm film cartridge into the film chamber, ensuring it seats correctly. Pull the film leader across the camera body and attach it to the take-up spool. Advance the film using the film advance lever, checking that the sprocket holes engage properly.
Close the back cover until it clicks shut. The film counter will automatically begin registering the number of exposures taken. To unload the film, press the film rewind button on the bottom of the camera and turn the rewind crank in the direction of the arrow until the film is fully retracted into the cartridge. Then, open the back cover and remove the film.
Canon advises against opening the back cover while film is loaded to prevent accidental exposure.
Common Issues and Solutions
The Canon AE-1 Program, as detailed in its instruction manual and service documentation, can occasionally present issues. A common problem is battery leakage, requiring careful cleaning of the battery compartment. If the shutter doesn’t fire, check the battery and ensure the film is loaded correctly. Light leaks can occur if the back door isn’t sealed properly or if the light seals are deteriorated – replacement is recommended.
Metering inaccuracies might arise from dirty light sensors; gently clean them with a soft brush. If the viewfinder display is dim, the battery may be weak. The Canon service center provides repair options for more complex problems. Always consult the manual before attempting any repairs yourself to avoid further damage.

Advanced Techniques and Tips
Canon’s instruction manual details utilizing external Speedlites, understanding depth of field, and exploring creative photography options with the AE-1 Program.
Using External Flash Units (Speedlites)
The Canon AE-1 Program offers compatibility with nine Canon Speedlites, enhancing photographic possibilities beyond the built-in flash. The instruction manual guides users on proper attachment and synchronization techniques. When utilizing an FD lens set to the ‘A’ mark, the camera automatically sets the shutter speed to 1/60th of a second and the aperture to automatic mode, facilitating seamless flash exposure.
Understanding the relationship between aperture, shutter speed, and flash output is crucial for achieving desired results. The manual details how to adjust flash exposure compensation to fine-tune lighting. Experimenting with different flash modes – such as automatic and manual – allows for creative control over illumination. Proper use of Speedlites expands the AE-1 Program’s capabilities, enabling photographers to capture stunning images in challenging lighting conditions, and master advanced photographic techniques.
Understanding Depth of Field
The Canon AE-1 Program’s instruction manual explains depth of field – the area in acceptable focus within a photograph. This is controlled by aperture (f-stop), focal length, and distance to the subject. Smaller apertures (larger f-numbers like f/16) yield greater depth of field, ideal for landscapes where sharpness throughout the scene is desired. Conversely, larger apertures (smaller f-numbers like f/2.8) create shallow depth of field, isolating the subject against a blurred background – perfect for portraits.
The manual illustrates how to utilize the depth-of-field scale on FD lenses to visually estimate the in-focus range at different apertures. Mastering depth of field allows photographers to creatively direct the viewer’s attention and enhance the visual impact of their images, transforming ordinary scenes into compelling works of art with the AE-1 Program.
Creative Photography with the AE-1 Program
The Canon AE-1 Program’s instruction manual encourages experimentation beyond automatic modes. Explore shutter priority (Tv) for motion blur or freezing action, and aperture priority (Av) to control depth of field creatively. Utilize external flash (Speedlites) – the manual details compatibility – for fill light or dramatic effects. Consider intentional camera movement for abstract imagery, or use filters to alter colors and contrast.
The AE-1 Program’s versatility allows for double exposures, achieved through a simple technique outlined in the manual, blending two images into one. Don’t be afraid to break the “rules” and develop a personal style. The camera’s robust build and reliable operation empower photographers to focus on artistic vision, transforming everyday moments into lasting memories.