
Dometic Air Conditioner Troubleshooting Manual: A Comprehensive Guide
This manual provides detailed guidance for diagnosing and resolving issues with Dometic air conditioning units‚ covering error codes‚ component failures‚ and preventative maintenance.
Dometic air conditioning systems are widely utilized in marine and RV applications‚ renowned for their robust cooling capabilities and innovative features. Understanding the fundamental operation of these units is crucial for effective troubleshooting. These systems typically incorporate a compressor‚ condenser‚ evaporator‚ and a circulating fan to deliver conditioned air.
Common issues often stem from power supply problems‚ refrigerant leaks‚ or component malfunctions. Familiarizing yourself with the specific model and its associated wiring diagrams will significantly aid in pinpointing the source of any problems. Regular maintenance‚ including filter cleaning‚ is essential for optimal performance and longevity.
Understanding Dometic Error Codes
Dometic AC units employ a sophisticated error code system to signal malfunctions‚ streamlining the diagnostic process; These codes‚ displayed on the unit’s control panel‚ pinpoint specific issues ranging from power failures (like E7) to communication errors (such as E1). Recognizing these codes is the first step towards effective repair.
Codes like P6 indicate high pressure switch activation‚ potentially signaling refrigerant issues. Others‚ including E0‚ E8‚ E9‚ and EE‚ often represent general display or system errors. A comprehensive understanding of each code’s meaning is vital for targeted troubleshooting and efficient resolution of AC problems.
Common Dometic AC Problems
Frequently encountered issues with Dometic air conditioners include loss of cooling performance‚ often linked to refrigerant levels or compressor malfunctions. Circulation pump failures‚ indicated by HPF codes‚ are also common‚ particularly in marine applications. Electrical problems‚ such as blown fuses or tripped circuit breakers (leading to E7 errors)‚ frequently occur.
Data communication errors (E1) can disrupt operation‚ while general display errors (E0‚ E8‚ etc.) may indicate control panel issues. Blower motor problems and capacitor failures also contribute to AC downtime‚ requiring systematic diagnosis and repair.
Safety Precautions Before Troubleshooting
Prior to any troubleshooting attempt‚ disconnect the Dometic AC unit from all power sources – both 120V AC and 12V DC. Refrigerant handling requires specialized training; avoid any attempt to service refrigerant lines without proper certification. Always wear appropriate personal protective equipment‚ including safety glasses and gloves.
Be cautious when working with electrical components‚ as even disconnected units may retain residual charge. If unsure about any procedure‚ consult a qualified HVAC technician. Never bypass safety devices like fuses or overload protectors.
Specific Error Code Troubleshooting
This section details solutions for common Dometic AC error codes like E7‚ E1‚ and P6‚ offering step-by-step guidance for diagnosis and repair.
Error Code E7: Loss of 120V Power
The E7 error code on a Dometic air conditioner signifies a disruption in the 120V power supply. This frequently stems from a blown fuse within the unit or a tripped circuit breaker in the associated electrical panel. Begin by checking fuses‚ ensuring replacements match the original amperage.
Next‚ inspect circuit breakers‚ resetting any that have tripped. Confirm adequate voltage supply verification at the AC unit itself using a multimeter; a lack of voltage confirms a power delivery issue. Address wiring concerns if present‚ and if the problem persists‚ professional assistance is recommended to avoid electrical hazards.
Checking Fuses
Begin by locating the fuse box associated with your Dometic air conditioner‚ typically near the unit or electrical panel. Carefully inspect all fuses related to the AC system for any signs of visible damage‚ such as a broken filament or discoloration. Always disconnect power before fuse inspection!
Remove each fuse individually and test it for continuity using a multimeter. Replace any blown fuses with new ones of the exact same amperage rating. Using a higher amperage fuse can cause severe damage. Ensure the new fuse seats correctly before restoring power and testing the unit.
Inspecting Circuit Breakers
Locate the main electrical panel supplying power to your Dometic air conditioner. Carefully examine the circuit breaker dedicated to the AC unit; a tripped breaker is a common cause of the E7 error. Reset the breaker by first switching it fully to the “OFF” position‚ then firmly back to “ON”.
If the breaker trips immediately again‚ this indicates a potential short circuit or overload. Do not repeatedly reset the breaker. Further investigation is needed to identify and resolve the underlying electrical issue before attempting to operate the AC unit again. Contact a qualified technician if unsure.
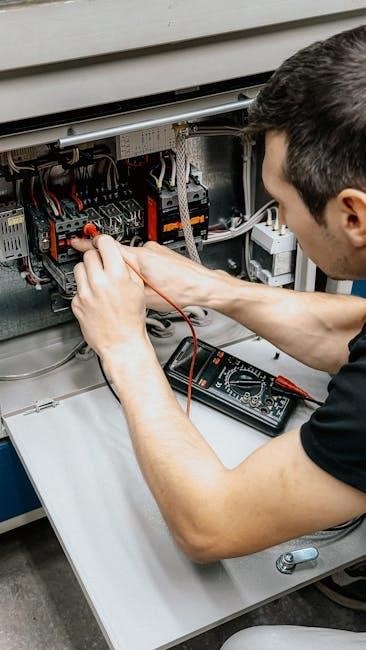
Voltage Supply Verification
Using a multimeter‚ carefully verify the voltage at the air conditioner’s power input. Ensure the unit is disconnected from power before testing. You should measure approximately 120V AC if your system is designed for standard US voltage. Low voltage can cause the E7 error and prevent proper operation.
If the voltage is significantly lower than 120V‚ trace the wiring back to the main electrical panel to identify any voltage drops or loose connections. Consult a qualified electrician if you are uncomfortable performing electrical tests or find significant discrepancies.
Error Code E1: Data Cable Communication Issue
The E1 error code signals a problem with communication between the Dometic air conditioner and its control system‚ often due to a faulty data cable connection. This frequently occurs with the 15‚000 BTU unit. Inspect the data cables running between the AC unit‚ the control panel‚ and any remote sensors.
Loose or corroded connections are common culprits. Ensure all connectors are firmly seated and free from corrosion. A damaged data cable may require replacement to restore proper communication and resolve the E1 error.
Identifying Loose Connections
Begin by visually inspecting all data cable connections at both the air conditioner unit and the control panel. Gently wiggle each connector to check for any play or looseness. Pay close attention to connections that may be exposed to vibration or moisture‚ as these are more prone to becoming detached.
Disconnect and reconnect each connector to ensure a secure fit. Look for any signs of corrosion or damage to the connector pins. If corrosion is present‚ clean the pins with a suitable electrical contact cleaner before reconnecting.
Data Cable Inspection
Thoroughly examine the entire length of the data cable for any visible signs of damage‚ such as cuts‚ abrasions‚ or kinks. Pay particular attention to areas where the cable passes through bulkheads or is routed near sharp edges. Check for any pinched or crushed sections of the cable‚ which could compromise the internal wiring.
Use a multimeter to test the continuity of each wire within the data cable. Ensure there are no open circuits or short circuits. If damage is detected‚ replace the entire data cable with a new one of the correct specification.
Control Board Examination
Carefully inspect the Dometic air conditioner’s control board for any signs of physical damage‚ such as burnt components‚ cracked solder joints‚ or corrosion. Look for any bulging or leaking capacitors‚ which are often indicative of failure. Ensure all connectors are securely seated and free from corrosion.
If possible‚ use a multimeter to check the voltage levels at various test points on the control board‚ comparing them to the values specified in the service manual. A faulty control board may require replacement by a qualified technician.
Error Code P6: High Pressure Switch Activation
The P6 error code on a Dometic AC unit signals activation of the high-pressure switch‚ typically indicating a problem within the refrigerant circuit. This could stem from low refrigerant levels‚ a restriction in the refrigerant lines‚ or a malfunctioning compressor. Begin by carefully checking the refrigerant level; a low charge is a common cause.
Next‚ assess the compressor’s operation to ensure it’s functioning correctly and not causing excessive pressure. Professional diagnosis and repair are crucial‚ as handling refrigerant requires specialized equipment and certification.
Refrigerant Level Check
Checking the refrigerant level requires specialized tools and knowledge; it’s best left to a qualified HVAC technician. Low refrigerant is a frequent cause of the P6 error code‚ triggering the high-pressure switch. Technicians will use gauges to measure the suction and discharge pressures‚ comparing them to the manufacturer’s specifications for your specific Dometic unit.
If the level is low‚ they’ll locate and repair any leaks before recharging the system. Never attempt to handle refrigerant yourself‚ as it’s a regulated substance and improper handling can be dangerous.
Compressor Operation Assessment
After verifying the refrigerant level‚ a technician must assess the compressor’s operation. Listen for unusual noises – clicking‚ buzzing‚ or grinding – which could indicate internal damage. Check if the compressor is attempting to start but failing‚ or if it runs intermittently. Voltage to the compressor should be confirmed during operation.
A locked rotor or internal short circuit will prevent cooling and trigger error codes. If the compressor isn’t functioning correctly‚ replacement is often the most practical solution‚ requiring a qualified HVAC professional.
Error Code E0‚ E8‚ E9‚ EE‚ E2‚ EA‚ P0‚ P1‚ P2‚ P4‚ P5‚ P7‚ P9‚ E3‚ EL: General Display Errors
These diverse error codes often point to intermittent communication glitches or internal system faults within the Dometic AC unit. A first step is to completely power cycle the unit – disconnect all power sources for several minutes‚ then reconnect. If the error persists‚ attempt a control panel reset‚ following the manufacturer’s specific instructions.
These errors can also indicate a need for software updates or‚ in more severe cases‚ a failing control board requiring professional diagnosis and repair.
Power Cycling the Unit
To effectively power cycle your Dometic AC‚ begin by completely disconnecting it from all power sources – this includes both 120V AC power and any DC power connections. Allow the unit to remain disconnected for a minimum of five minutes to ensure all internal capacitors fully discharge.
Reconnecting power allows the system to reboot‚ potentially clearing temporary errors and restoring normal operation. This simple step often resolves minor glitches before escalating to more complex troubleshooting procedures.
Control Panel Reset Procedures
If power cycling doesn’t resolve display errors (E0‚ E8‚ E9‚ EE‚ E2‚ EA‚ P0‚ P1‚ P2‚ P4‚ P5‚ P7‚ P9‚ E3‚ EL)‚ a control panel reset might be necessary. Locate the reset button – its position varies by model‚ so consult your specific unit’s documentation. Typically‚ it’s a small recessed button requiring a pin or similar tool.
Press and hold the reset button for approximately 10-15 seconds. This will restore the control panel to its factory default settings‚ potentially clearing corrupted data causing the display issue. After resetting‚ reconfigure any personalized settings.
Component-Specific Troubleshooting
This section details troubleshooting procedures for individual Dometic AC components‚ including circulation pumps‚ blower motors‚ and the compressor‚ aiding targeted repairs.
Circulation Pump Issues (HPF Code Related)
The HPF code on Dometic marine air conditioners frequently indicates a problem with the circulation pump‚ hindering proper coolant flow and cooling performance. Diagnosing involves verifying pump operation and checking for obstructions. A failing pump requires replacement; ensure the new pump matches the original specifications for compatibility.
Diagnostic procedures include checking for voltage at the pump connector and listening for pump operation during a cooling cycle. If the pump isn’t running‚ inspect the wiring harness for damage or loose connections. A blocked pump impeller can also trigger the HPF code‚ necessitating impeller cleaning or pump replacement.
Pump Replacement Guide
Replacing the circulation pump begins with disconnecting power to the Dometic AC unit. Carefully access the pump‚ typically located near the heat exchanger. Disconnect the electrical connections and hose clamps securing the pump to the cooling lines. Note the hose routing before removal for correct reinstallation.
Install the new pump‚ ensuring proper hose connections and secure clamping to prevent leaks. Reconnect the electrical wiring‚ verifying correct polarity. Before restoring power‚ double-check all connections. Run a test cycle to confirm proper pump operation and cooling performance‚ observing for any leaks or unusual noises.
Diagnostic Procedures for Circulation Pump
Begin by verifying the circulation pump receives power during operation‚ using a multimeter. Check for voltage at the pump’s electrical connector when the AC is running. If power is present‚ listen for pump operation; a lack of sound suggests a failed pump. Inspect the pump housing for leaks‚ indicating internal damage.
Further diagnosis involves checking for obstructions in the cooling lines. Disconnect the lines and inspect for debris. A restricted flow can prevent proper pump function. If the pump runs but doesn’t circulate‚ a blockage is likely. Address any obstructions before replacing the pump.
Blower Motor Problems
Common issues with Dometic AC blower motors include failure to start‚ running at reduced speed‚ or producing unusual noises. A lack of airflow often indicates a blower motor problem. Begin by visually inspecting the motor for physical damage‚ such as a cracked housing or burnt wiring. Check the blower wheel for obstructions like debris or ice buildup.
Electrical testing is crucial. Verify the motor receives proper voltage. A faulty capacitor is a frequent cause of blower motor failure; testing the capacitor’s capacitance is recommended. If the motor hums but doesn’t spin‚ the capacitor is likely defective.
Blower Motor Testing
To test the blower motor‚ disconnect power to the AC unit. Use a multimeter to check the motor windings for continuity; a lack of continuity indicates an open winding and a failed motor. Verify the voltage reaching the motor when the fan is switched on – it should match the motor’s voltage rating.
Observe the amperage draw during operation; excessive amperage suggests a failing motor or obstruction. Carefully spin the blower wheel by hand; it should rotate freely. Resistance should be measured across the motor terminals. A reading of zero or infinite resistance indicates a faulty motor.
Capacitor Check
Begin by safely disconnecting power to the Dometic AC unit. Discharge the capacitor using a properly insulated screwdriver before handling. Visually inspect the capacitor for bulging or leaking – these are clear signs of failure. Use a capacitance meter to test the capacitor’s value; it should be within 5-10% of its rated value.
A significantly lower reading indicates a degraded capacitor. Also‚ check for shorts using a multimeter set to resistance; a shorted capacitor will show very low resistance. Replace the capacitor if it fails any of these tests‚ ensuring the replacement has the same voltage and capacitance ratings.
Compressor Troubleshooting
Compressor issues often stem from overload protection tripping or internal winding failures. First‚ verify the overload protector hasn’t activated – a tripped protector resets after cooling. If it repeatedly trips‚ investigate further. Use a multimeter to perform a compressor winding resistance test; compare readings to the manufacturer’s specifications.
Significant deviations suggest damaged windings. Check for open circuits‚ indicating a complete failure. Also‚ listen for unusual noises during operation‚ like clicking or humming‚ which can signal internal problems. A failing compressor usually requires professional replacement.
Overload Protection Check
The compressor’s overload protector safeguards against overheating; Begin by visually inspecting the protector for physical damage. Use a multimeter set to continuity to test if the protector is functioning correctly; a lack of continuity indicates a tripped state. Allow the compressor to cool completely‚ then retest.
If the protector continues to trip repeatedly‚ it suggests an underlying issue – potentially a locked rotor‚ refrigerant problems‚ or winding faults within the compressor itself. Don’t bypass the overload protector; it’s a crucial safety device.
Compressor Winding Resistance Test
To assess the compressor’s internal health‚ measure the resistance of each winding using a multimeter. Disconnect power and the compressor’s electrical connections first! Compare the readings to the manufacturer’s specifications – typically found in the service manual. Significant deviations from these values indicate potential winding damage‚ such as shorts or opens.
Also‚ check for resistance between the windings and the compressor casing; any reading here signifies a ground fault‚ requiring compressor replacement. Accurate readings are vital for proper diagnosis.
Maintenance and Prevention
Regular upkeep‚ including filter cleaning‚ coil maintenance‚ and system checks‚ significantly extends the lifespan and efficiency of your Dometic air conditioner.
Air Filter Cleaning and Replacement
Maintaining a clean air filter is crucial for optimal Dometic AC performance and efficiency. A dirty filter restricts airflow‚ causing the unit to work harder‚ potentially leading to overheating and reduced cooling capacity. Inspect the filter monthly during peak usage and clean or replace it as needed.
For washable filters‚ gently rinse with water‚ allowing it to dry completely before reinstalling. Disposable filters should be replaced with a new one of the correct size. Ignoring filter maintenance can contribute to compressor issues and overall system strain‚ shortening the unit’s lifespan. Regular filter checks are a simple preventative measure.
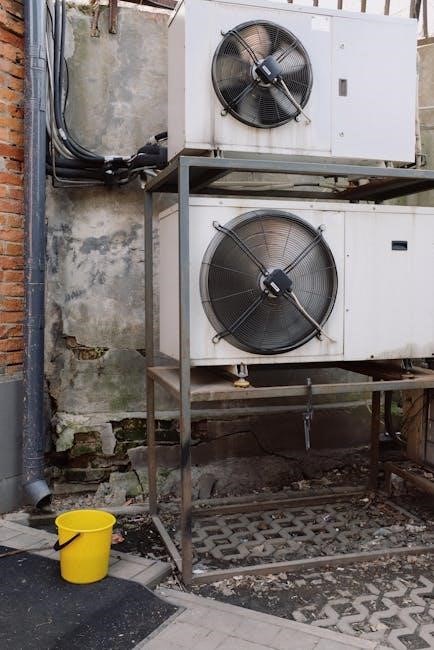
Condenser Coil Cleaning
The condenser coil‚ typically located on the exterior of the unit‚ dissipates heat. Over time‚ it accumulates dust‚ debris‚ and potentially corrosion‚ hindering its ability to release heat effectively. This results in reduced cooling performance and increased energy consumption. Inspect the coil at least twice a year‚ or more frequently in dusty environments.
To clean‚ gently use a soft brush or fin comb to remove loose debris. A coil cleaner specifically designed for AC units can be applied‚ following the manufacturer’s instructions. Avoid bending the fins‚ as this restricts airflow. A clean condenser coil ensures efficient operation and prolongs the AC’s life.

Regular System Checks
Proactive maintenance is crucial for preventing costly repairs and ensuring optimal performance of your Dometic AC unit. Schedule regular system checks‚ ideally before the cooling season begins and periodically throughout. These checks should include inspecting all wiring connections for tightness and corrosion‚ verifying proper airflow through vents‚ and listening for unusual noises during operation.
Additionally‚ monitor the unit’s performance for any decline in cooling capacity. Addressing minor issues promptly can prevent them from escalating into major problems. Keep a log of maintenance performed and any observed issues for future reference.